BMW Z3
SEAT SPACER DRAWINGS
Kit 003 (BMW Z3 Seat Spacers)
These kits are no longer for sale, but please feel free to use my drawings to make them.
10mm and 15mm spacers use hollow bolts on the front of the seats that screw onto the existing studs.
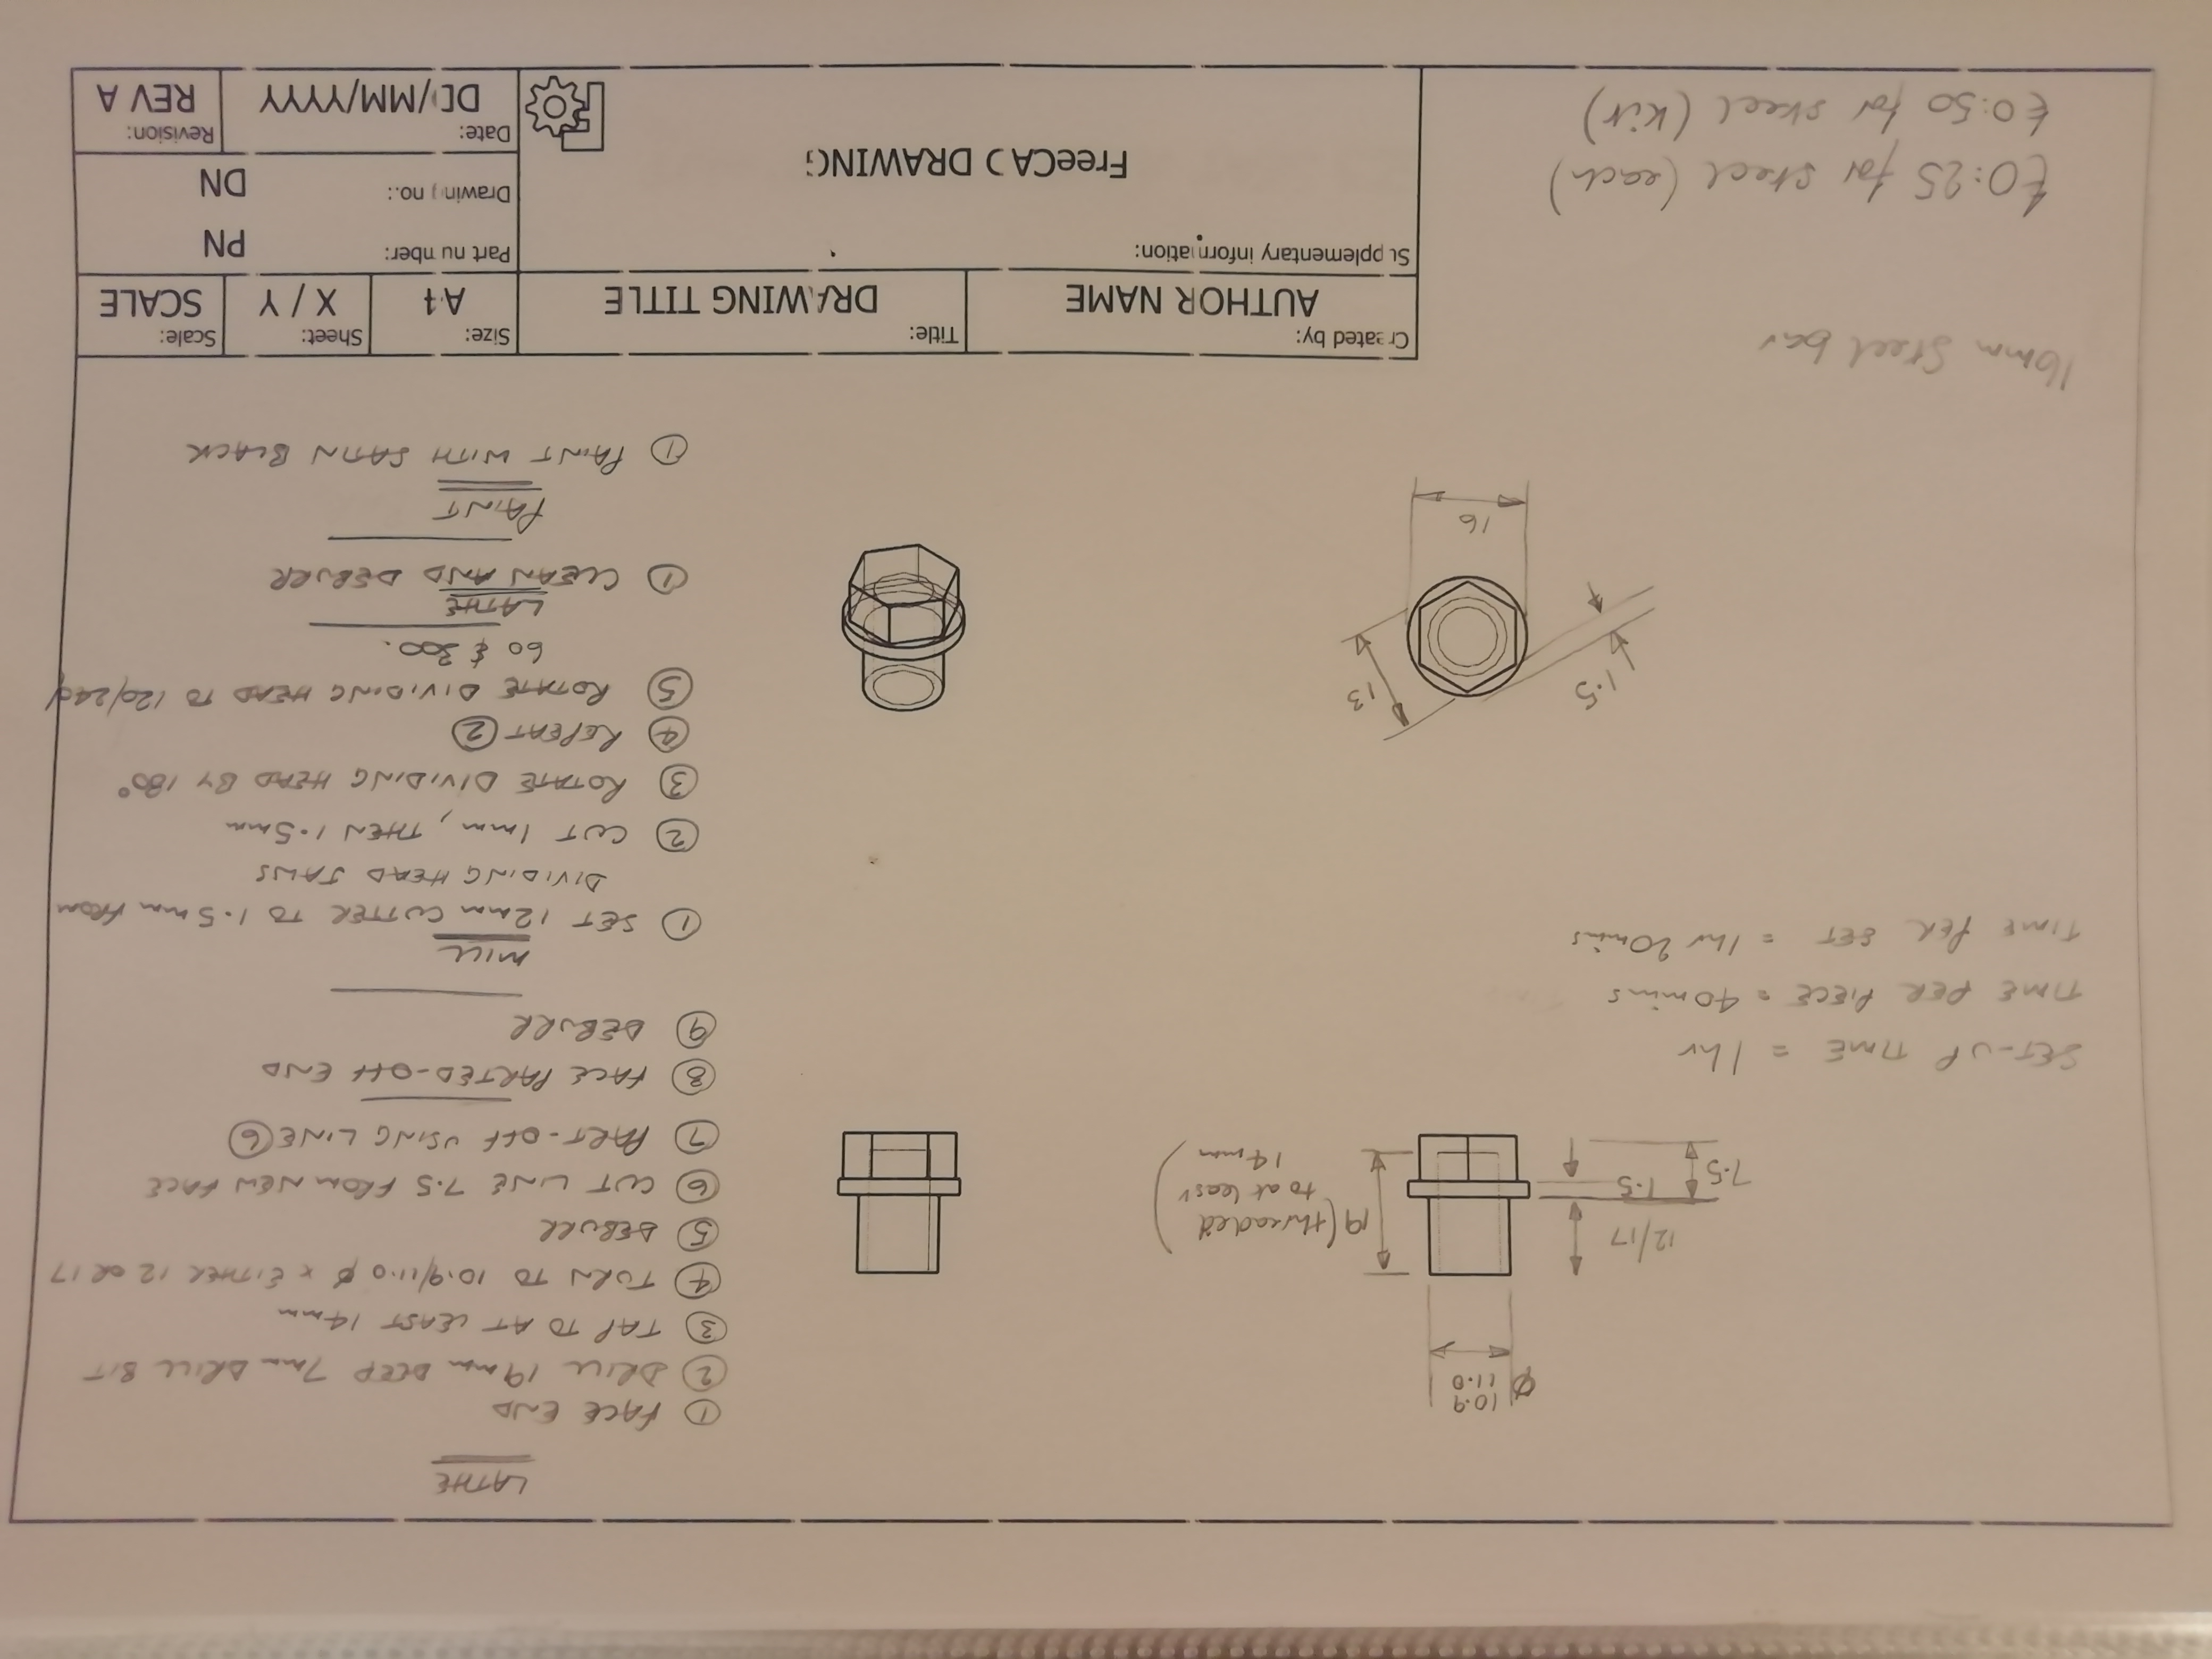
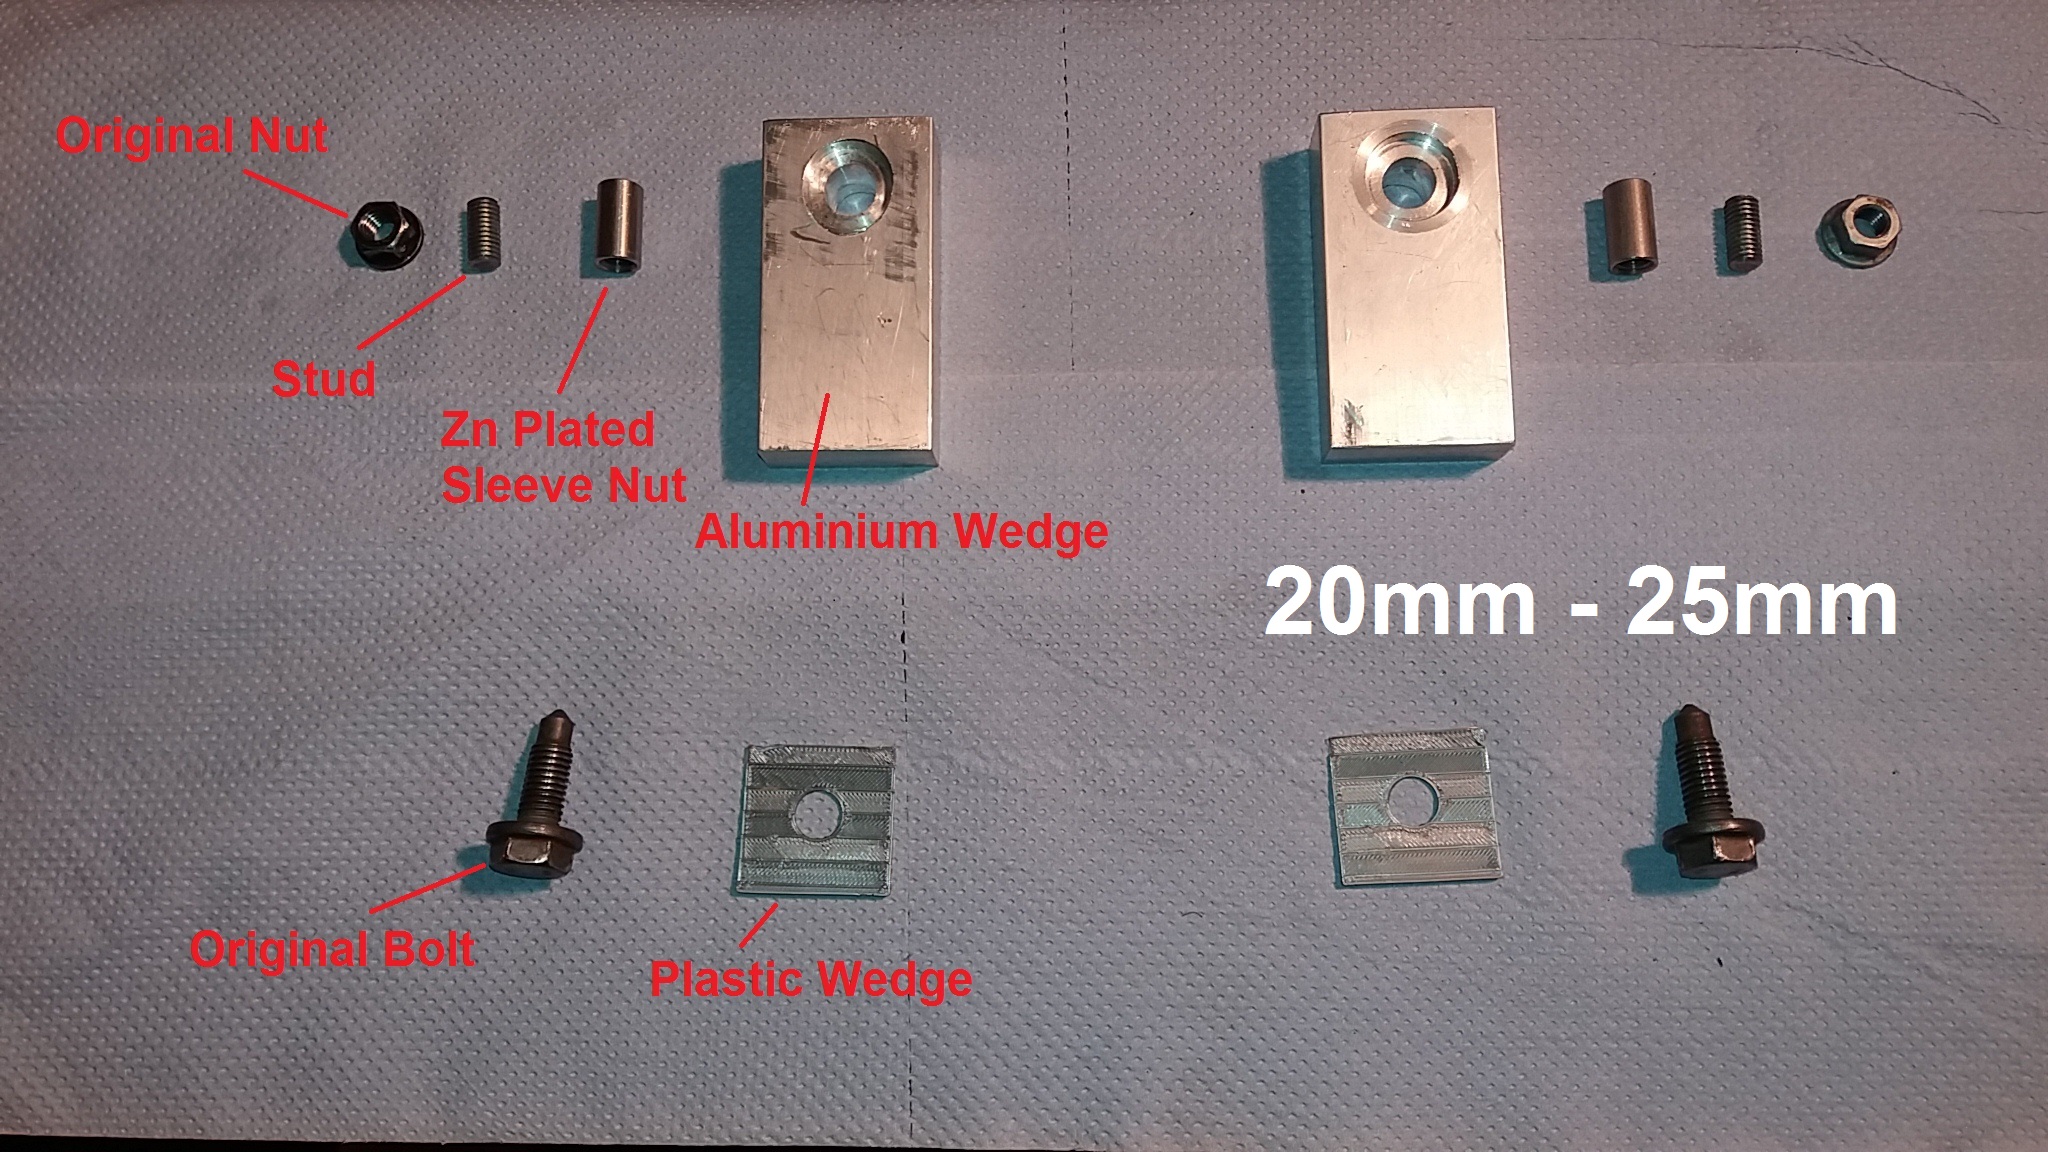
20mm and 25mm spacers use hollow nuts on the front of the seats that screw onto the existing studs. You then screw studs into these hollow nuts and secure the seats with the existing nuts.
The rear of the seats is secured using the existing bolts, but they sandwich a wedge between the seat and the floor. I used to make these wedges using a 3-D printer.
There are four sizes of spacer available...
10mm Kit
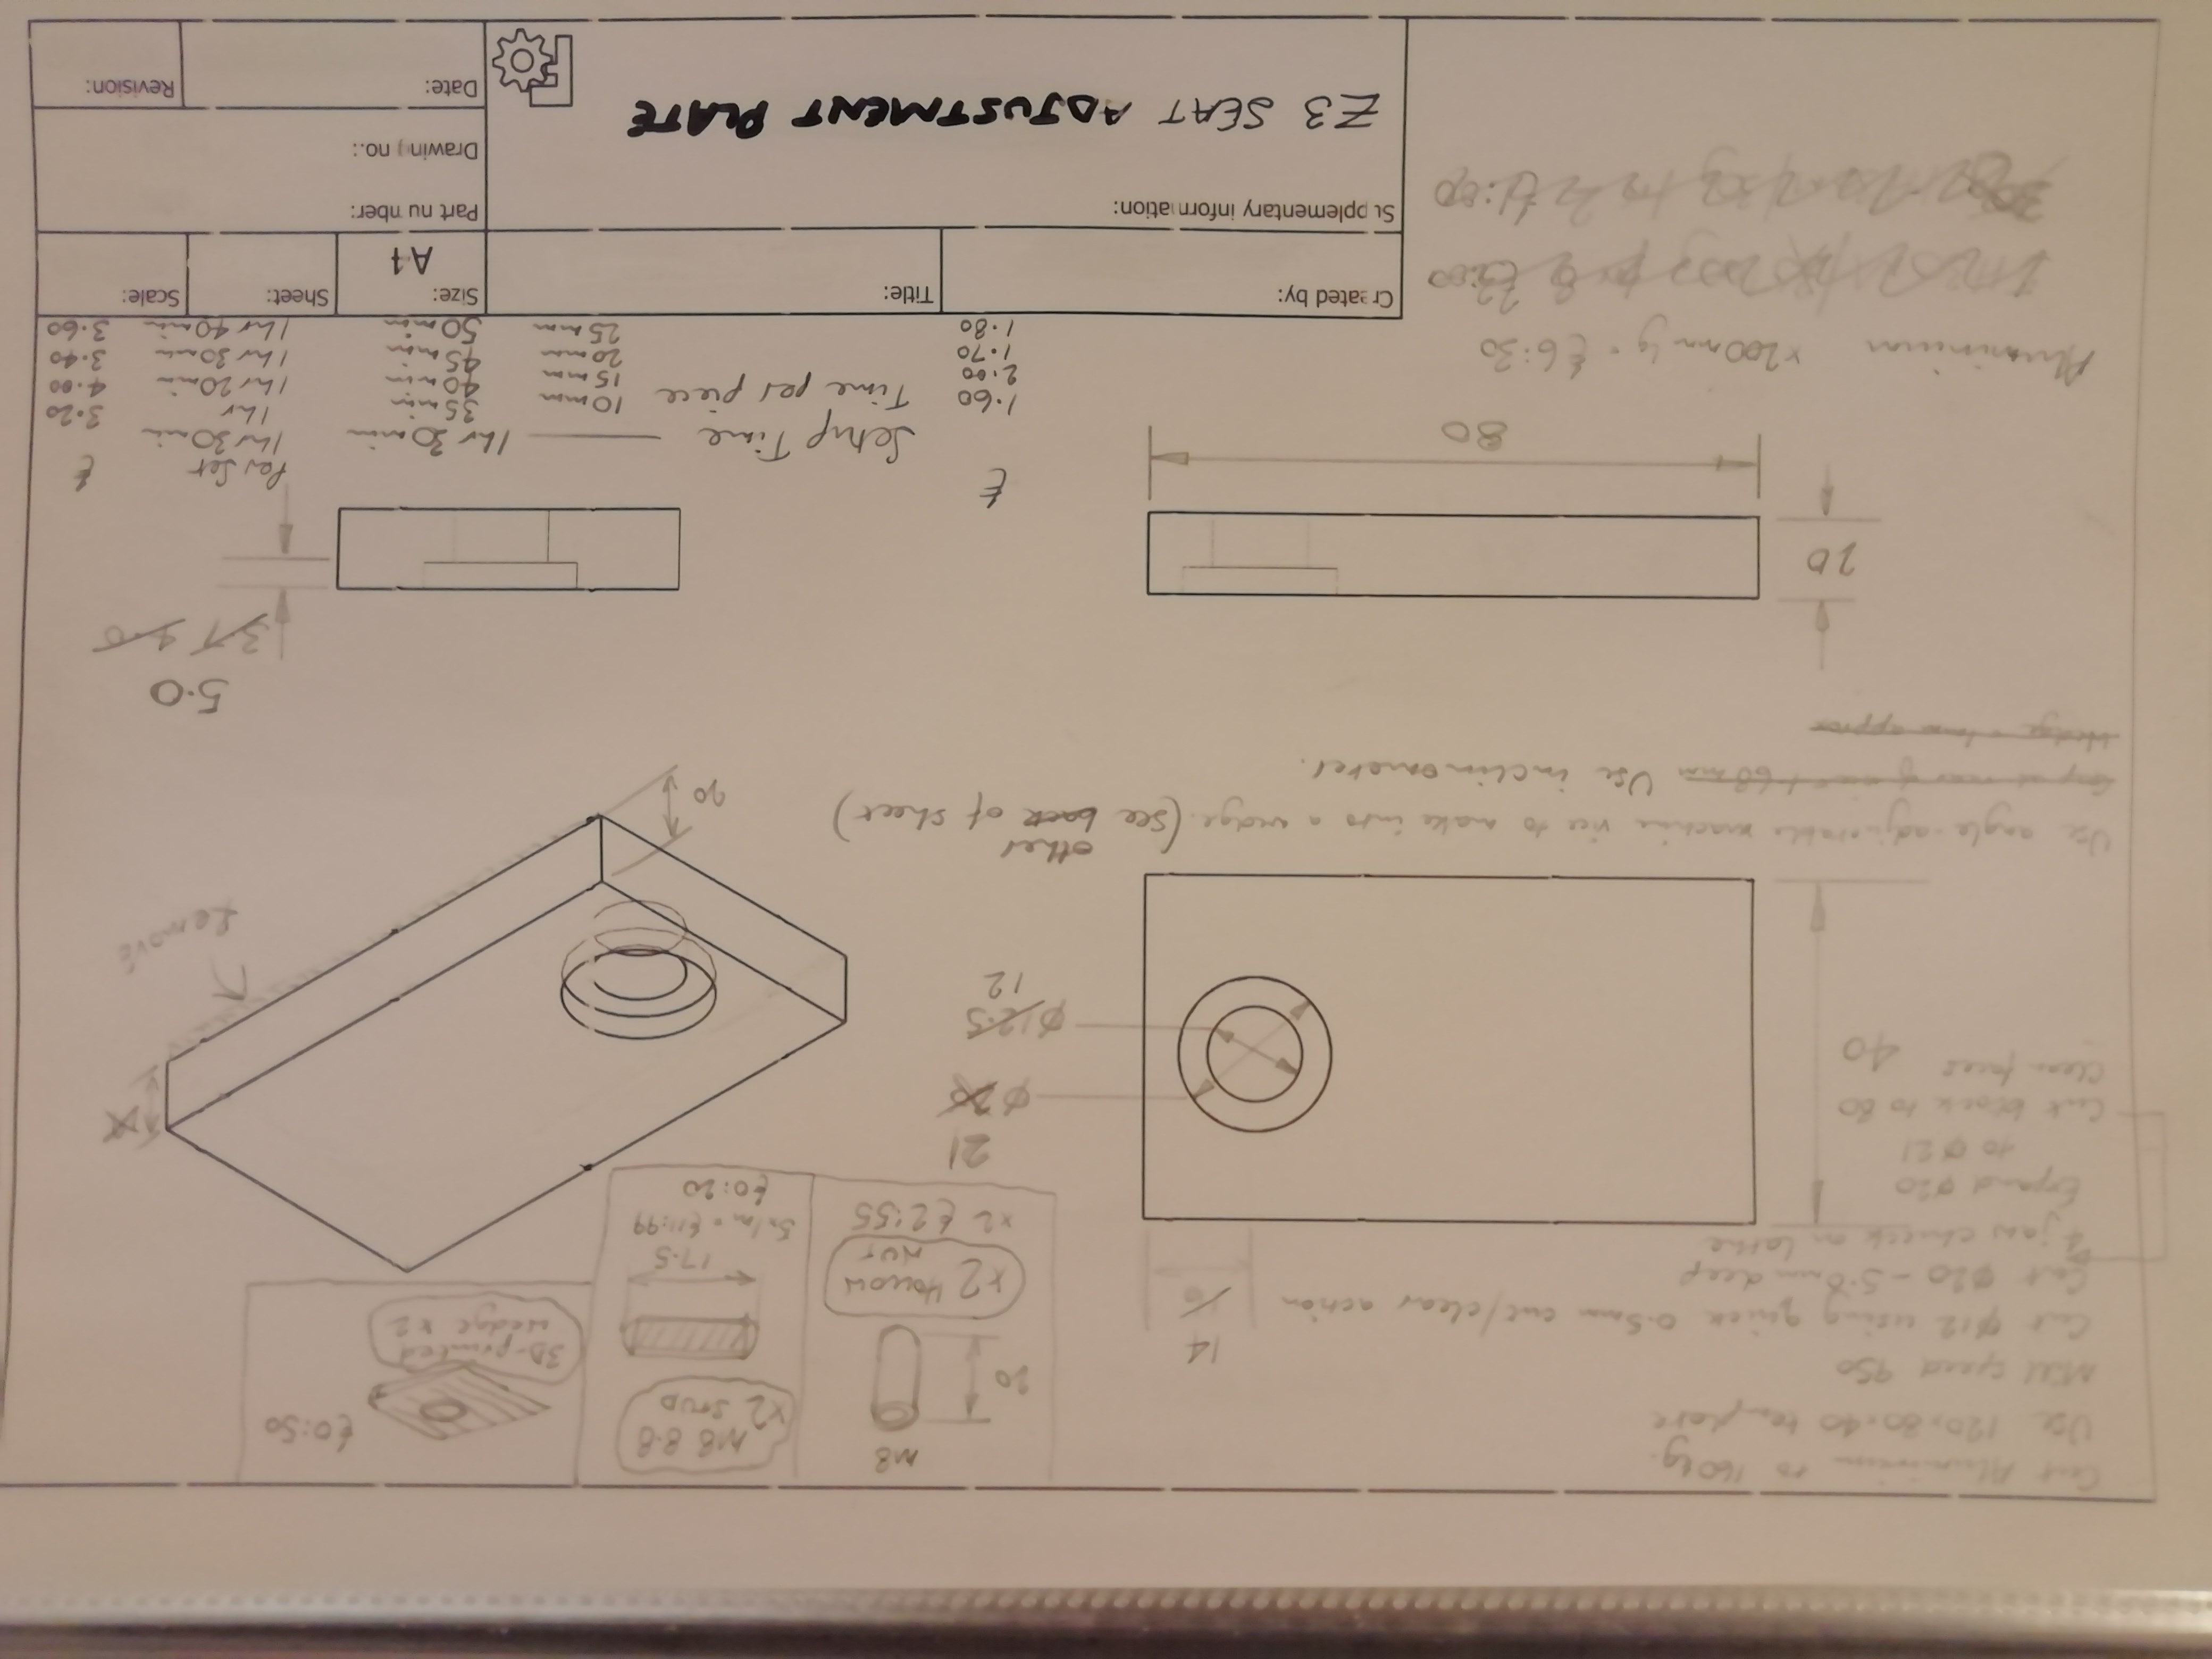
2x 10mm x 40mm x 80mm Aluminium blocks milled at an angle of 1.6 degrees.
2x 35mm x 35mm PLA wedges
2x M8 extended nuts with 12mm extension.
15mm Kit
2x 15mm x 40mm x 80mm Aluminium blocks milled at an angle of 2.4 degrees.
2x 35mm x 35mm PLA wedges
2x M8 extended nuts with 17mm extension
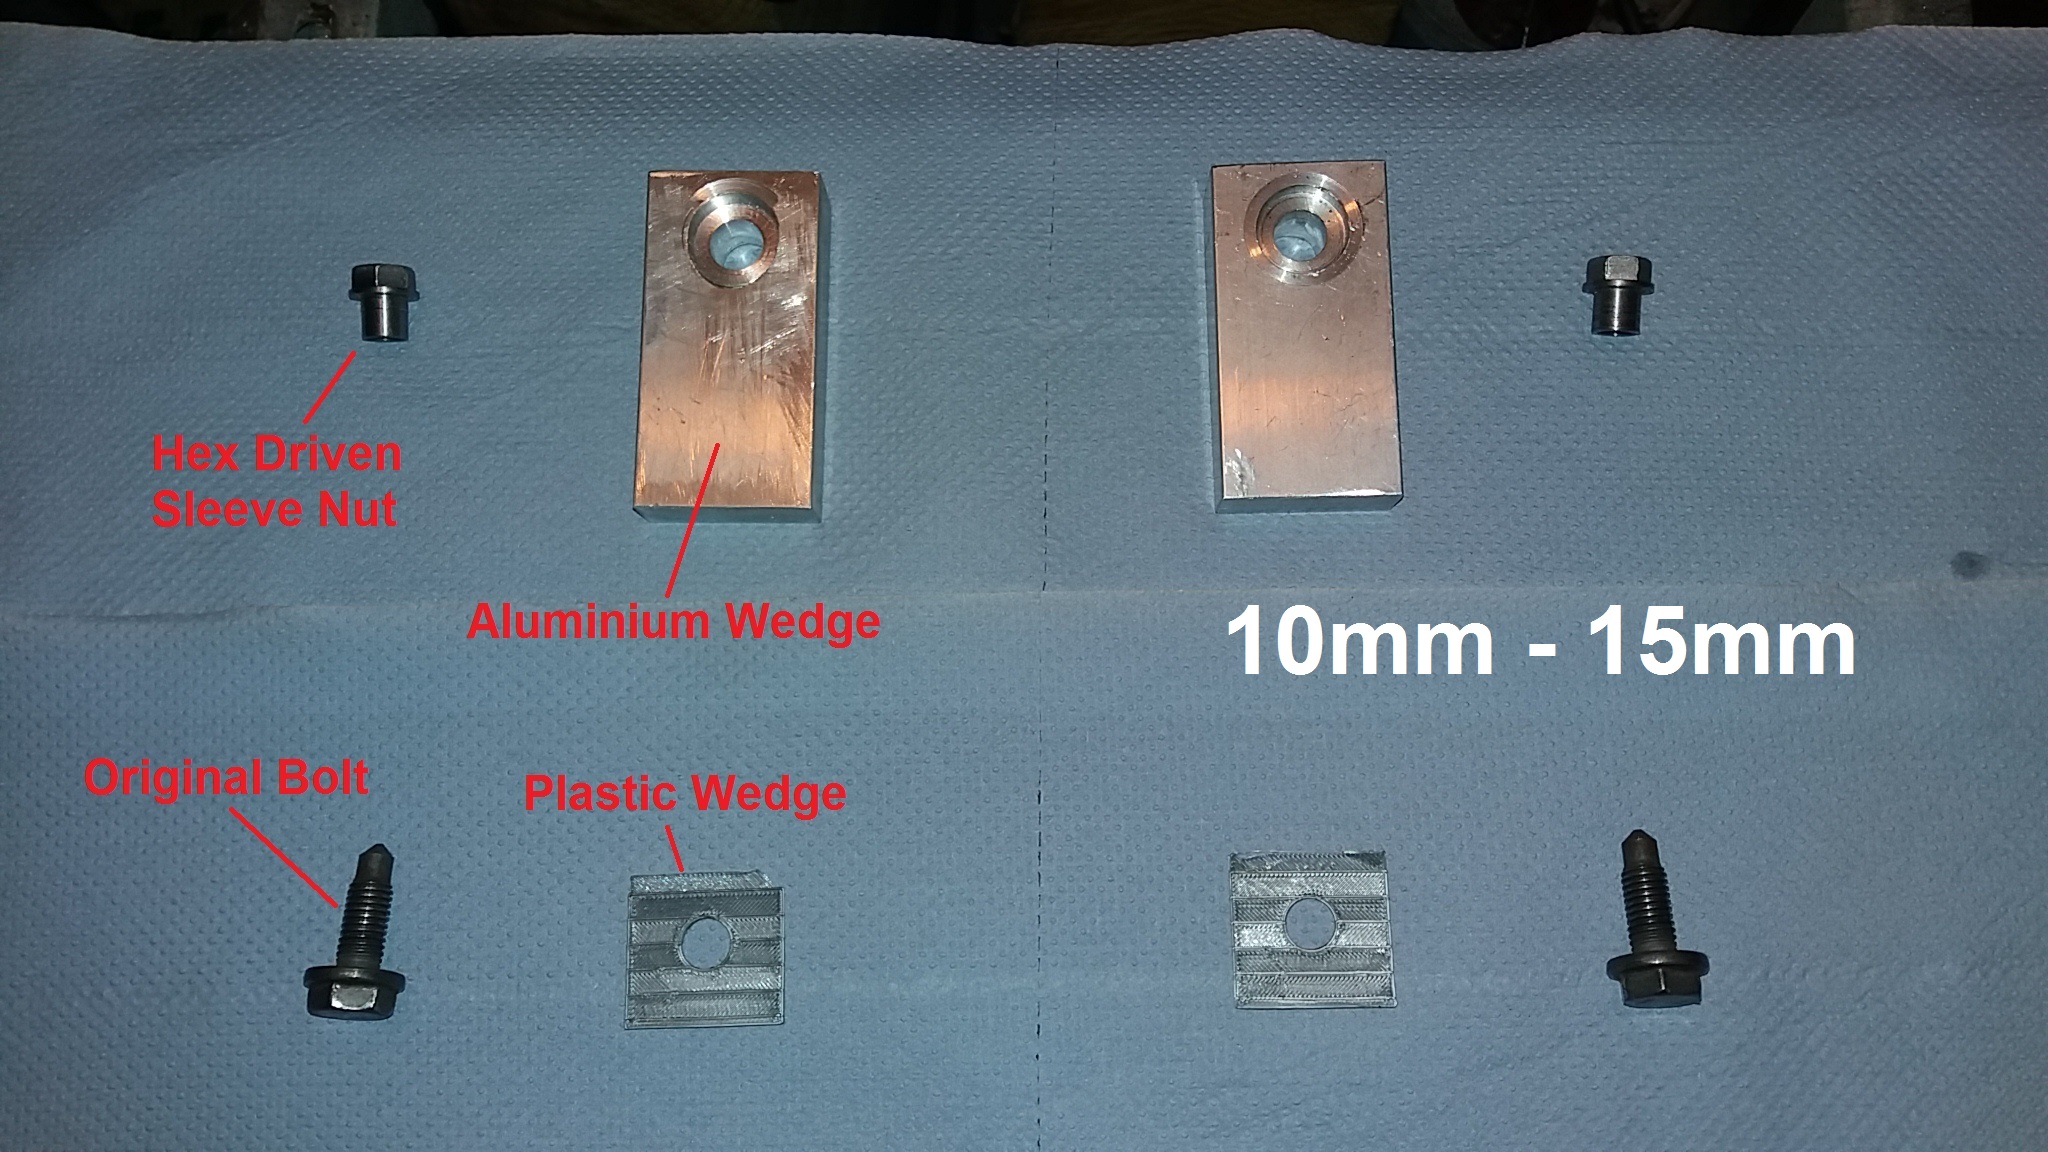
Image showing what is included in the 10mm and 15mm kits.
20mm Kit
2x 20mm x 40mm x 80mm Aluminium blocks milled at an angle of 3.2 degrees.
2x 35mm x 35mm PLA wedges
2x M8 x 20mm Zinc-plated sleeve nuts
2x M8 x 17mm Grade 8.8 studs
25mm Kit
2x 25mm x 40mm x 80mm Aluminium blocks milled at an angle of 4.0 degrees.
2x 35mm x 35mm PLA wedges
2x M8 x 25mm Zinc-plated sleeve nuts
2x M8 x 21mm Grade 8.8 studs
Image showing what is included in the 20mm and 25mm kits.
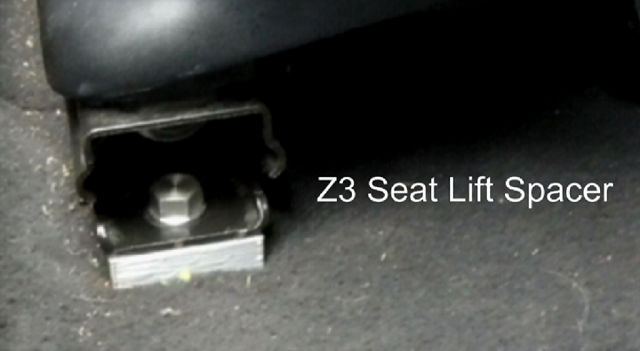
Image showing the spacer in use.
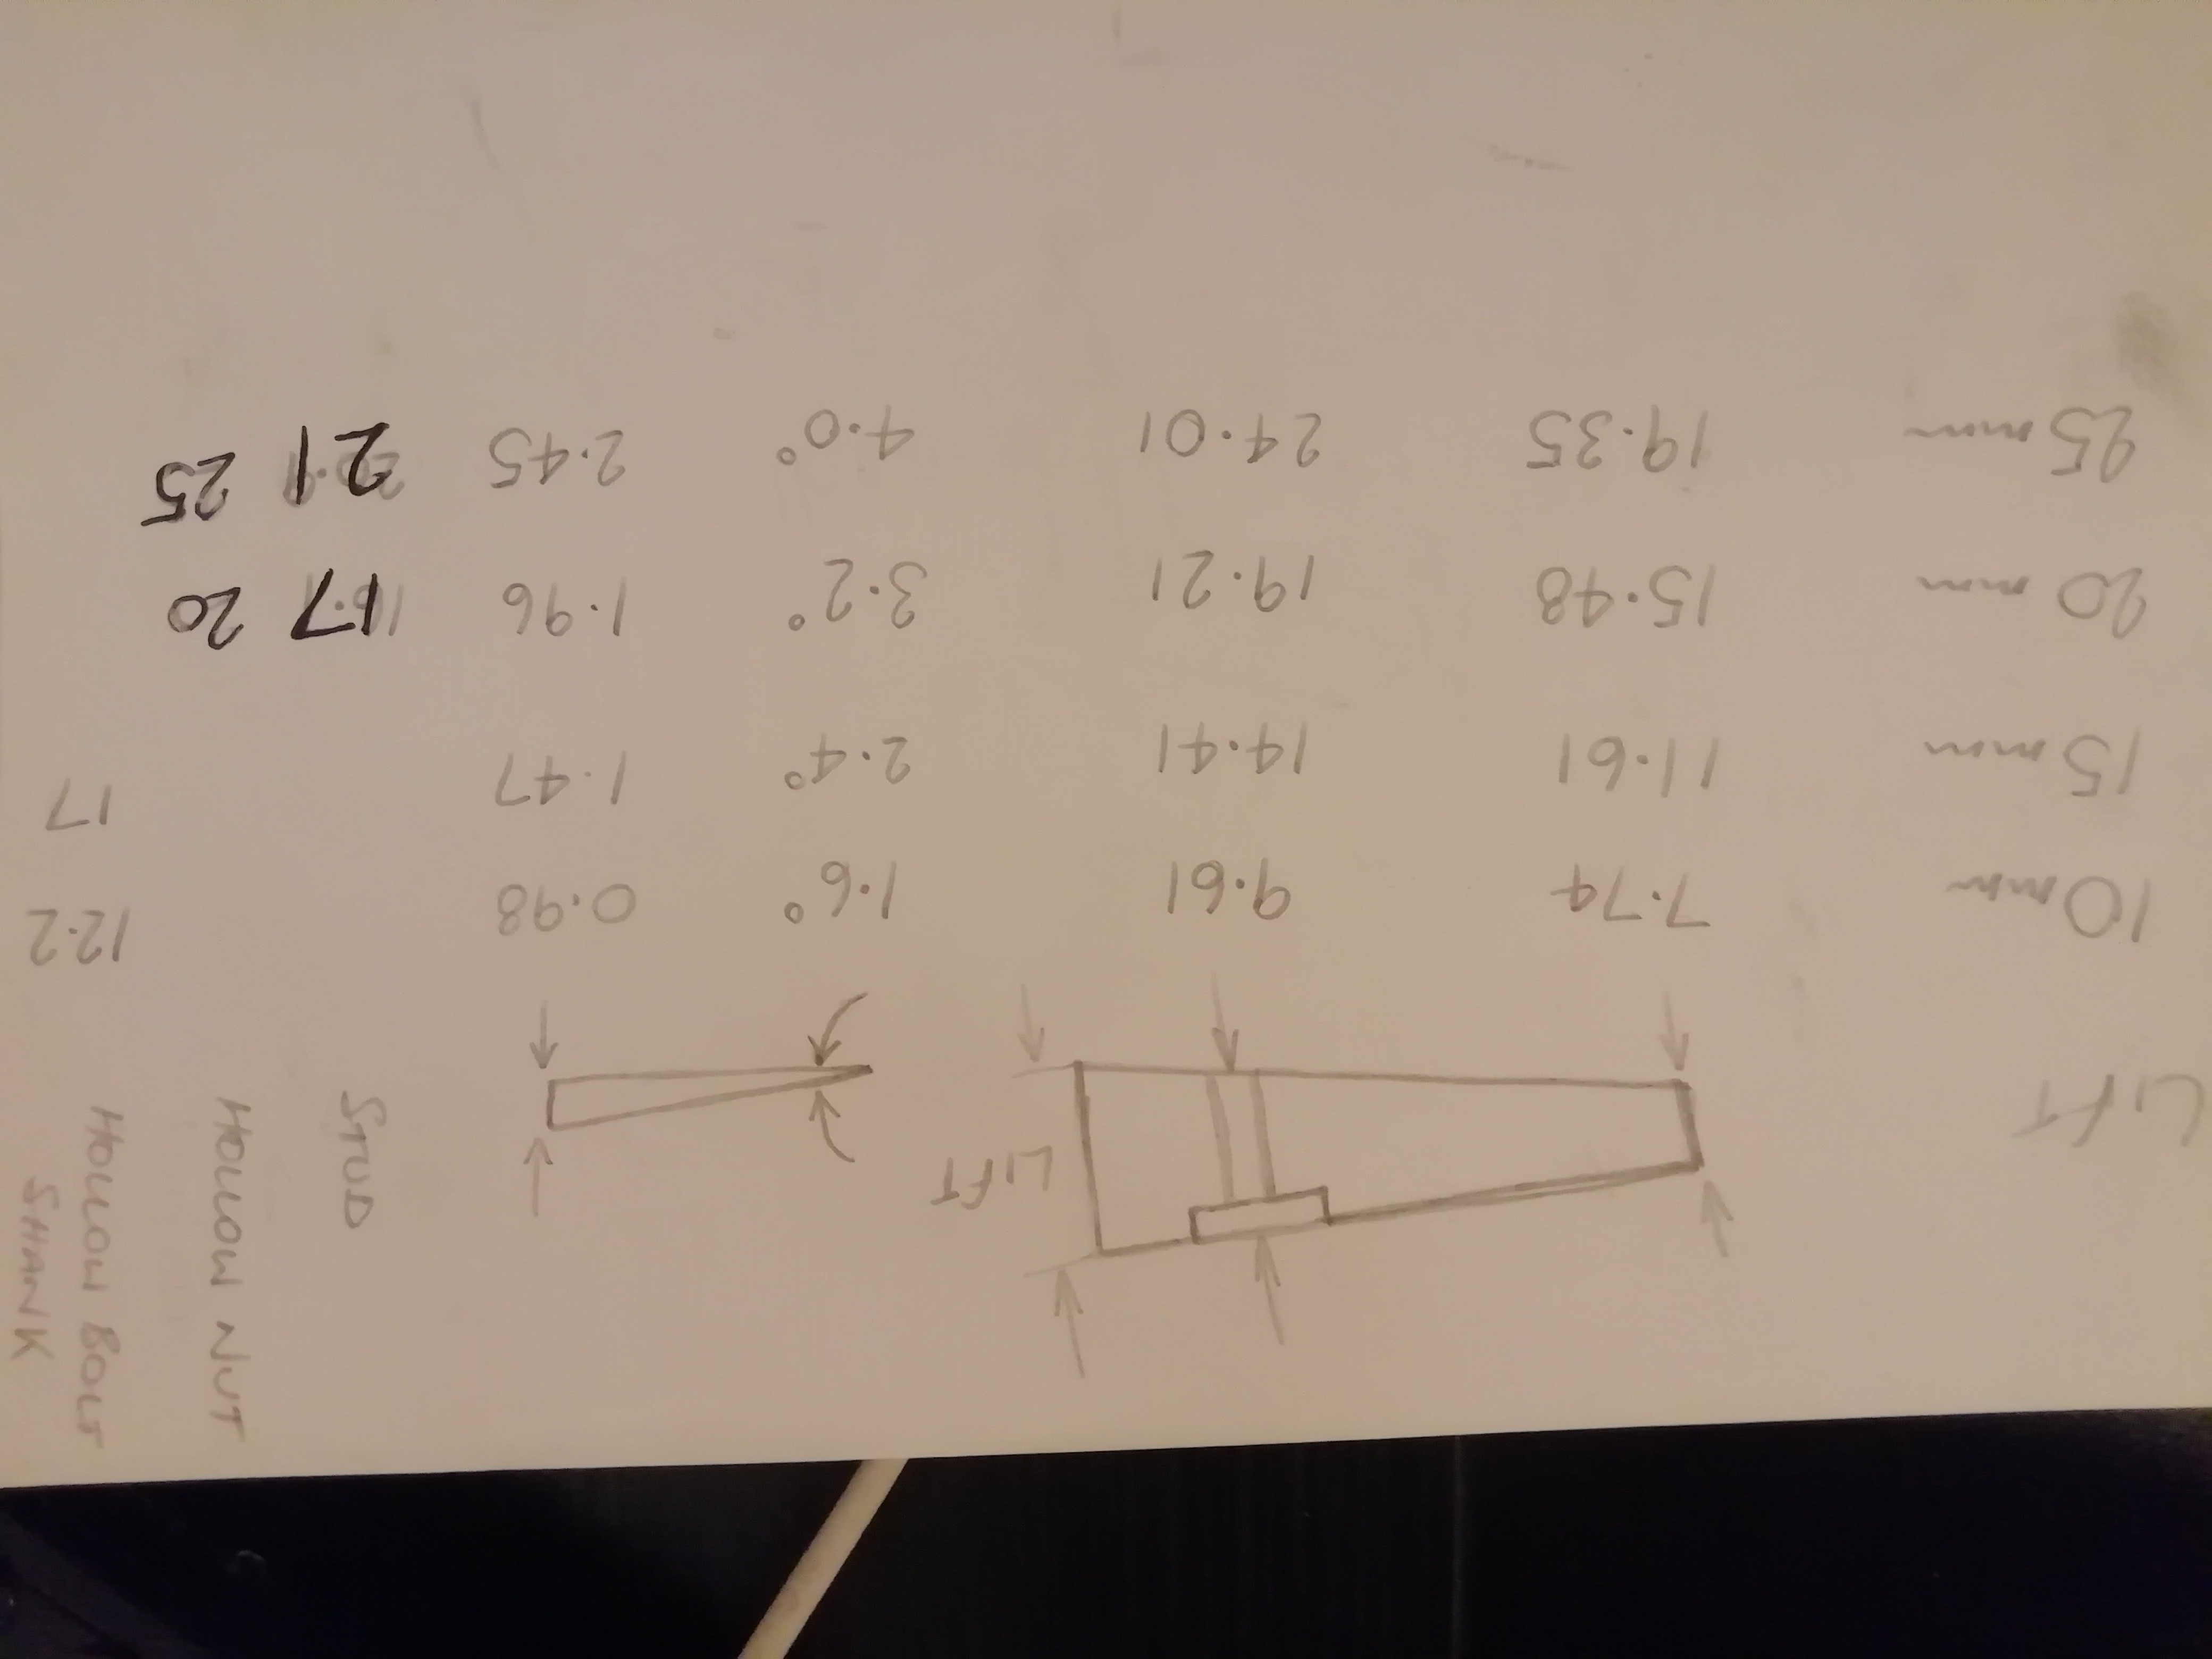
Before ordering a spacer kit, I suggest that you measure the amount of lift you want.
Here is a link to the discussion I had while I was developing the spacers - zRoadster.net
Below is a video that I made showing how to fit the spacers. At the end of the video, you can see the difference the spacers make to the tilt of the seat.